Recently in Food Category
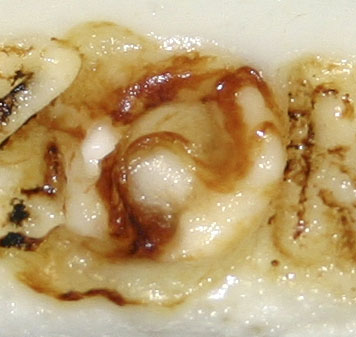
well, that's what they look like up close - caverns of pointy sugar surfaces.
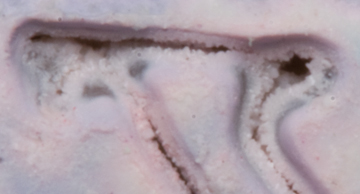
the straight-ish line across in the above image is about 1/8 inch long.
below is a little less of a close-up. these tiny objects moved just a bit while being etched, hence the wiggly lines.
below is a little less of a close-up. these tiny objects moved just a bit while being etched, hence the wiggly lines.
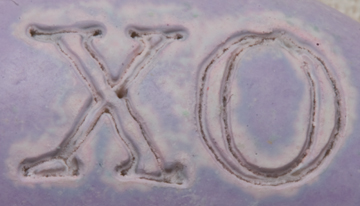
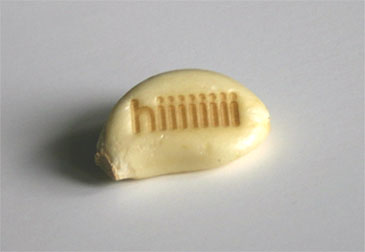
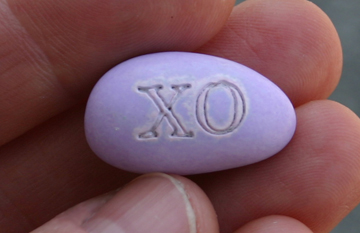
ok, here's one complete item. recognize it? it's edible. you probably had your last one at a wedding. they're often given away as favors although if you ever get an etched one, Let Me Know!!
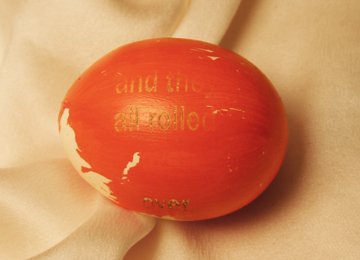 well, it's a pretty slew of mistakes. displayed on eggshell silk no less.
I wanted to etch a painted unshelled hard boiled egg. so I painted one. orange. did it in 3 parts since I didn't want fingerprints in the paint. took a day.
then it took about 5 days to get it together with the laser. after a few days I put it in a small plastic container and stored it in the fridge. when I pulled it out to place it on the laser table, I noticed it was kinda slimy. but with no cracks. was hard boiledness oozing out through the shell? had the paint dissolved something? I washed it off ... a bit too much ... and the acrylic paint started to come off. I stopped and preserved as much paint as I could, drying it with a paper towel and gentle pressure.
I was going to have it tell a story, rolling it 15 degrees between line etchings.
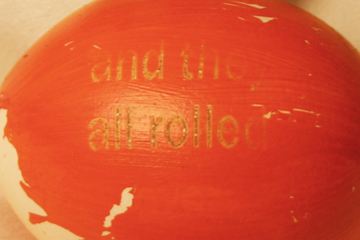 then decided to just see how it went with three lines of text in a one inch square. it's kinda bearing out the message "and they / all rolled / over" but the "over" way at the bottom of the egg was a subsequent run. the "over" from this run was right under the "all rolled" that you can see and was barely visible in my original higher res image.
I often get the question about how an etching will come out on a curved surface. well, here's your answer. for an eggshell. painted with acrylics. ok, it's a grade A large egg. but I don't know the specs on curvature variances allowed per grade. I think acrylic would do a bit better. but not glass. or coated metal (edge of laptop). you just gotta try it.
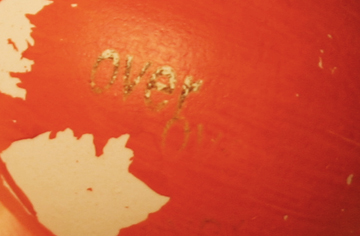 at left - you can see that sometimes it burns all the paint away, sometimes it leaves the paint burnt, sometimes it barely marks the paint. this was all during curvature etch testing, which, if it really mattered, I'd have to have a better setup than this to measure what I did so I could explain it and pass it on.
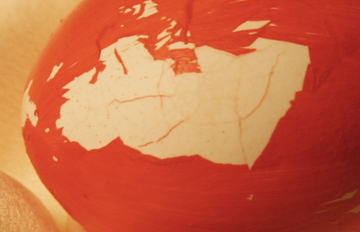 the cracks are orange. but the orange paint didn't penetrate the thin membrane around the egg itself.
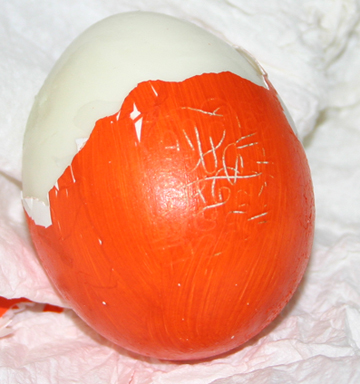 as I was peeling, I realized I'd forgotten all about this curve that I'd cut with cold vector settings. shows promise for future trials. if only I could get that jig to work to spin it on the rotary attachment.
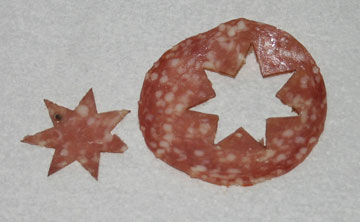
don't try this at home. or at work. the taste is absolutely totally humongously terrible!
why?? I. don't. know. I etch little sausages and they're fine. every other food item I've etched I've been able to eat with at most tasting only a slight bit of a burn flavor.
but this stuff I swear turned into somehing else. how to know which sausages work? have any ideas? I'll be much more wary tasting these things going forward.
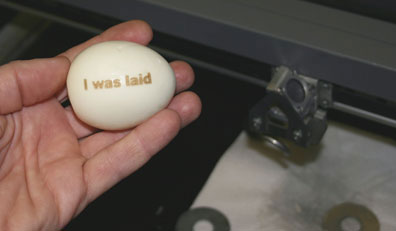
but for now, I continue to take whatever permitted substances I can find and stick them in the laser to see how they will be affected.
yesterday was no different with a hard boiled egg. the question always is ... what mark should I make? every item is a Rorschach test for my brain ... what kind of joke will it make this time. I don't even feel in control. I just present it with these items and it responds. I know nothing.
a couple guys were in the room at the time. as soon as one of them heard what I was going to do, he bolted, afraid of the ensuing smell. that didn't even occur to me and I'm happy to report it didn't do that. it did smell burnt with a hint of egg but you had to get your nose within a few inches of it.
a couple guys were in the room at the time. as soon as one of them heard what I was going to do, he bolted, afraid of the ensuing smell. that didn't even occur to me and I'm happy to report it didn't do that. it did smell burnt with a hint of egg but you had to get your nose within a few inches of it.
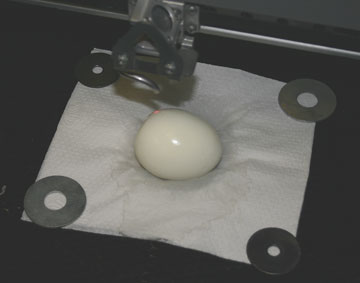
above, a pristine freshly peeled (and wet) hard boiled egg awaits its hot fate.
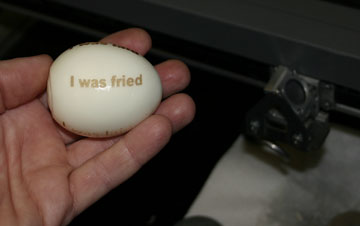
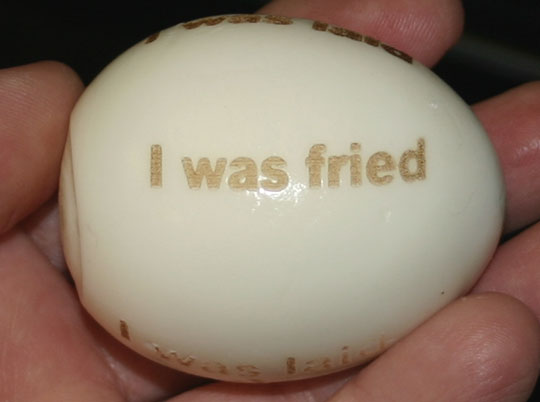 above: in between declaring its laid fate, it also talked about being fried. you can see a lighter burn on the bottom and a darker one on the top of the egg.
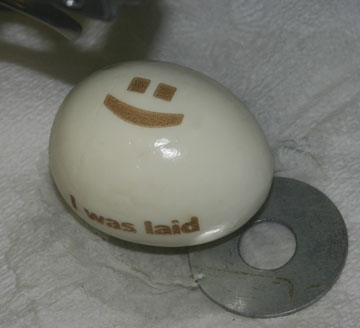
I had originally etched "I have been laid" and when I changed it to "I was laid" I got a lesson in the latter being better grammar thanks to the other guy in the room whose mom used to obsessively correct his grammar as a kid. I talked with more people about this point and can't swear I totally get it but gee, the conversations that can ensue when one tries to etch a hard boiled egg.
if so, I have just the cake.
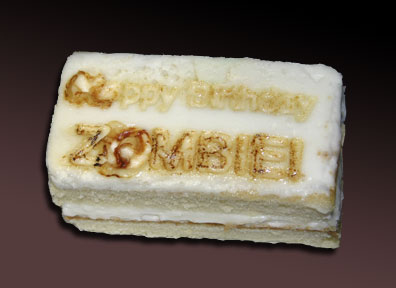
 oh, yum.
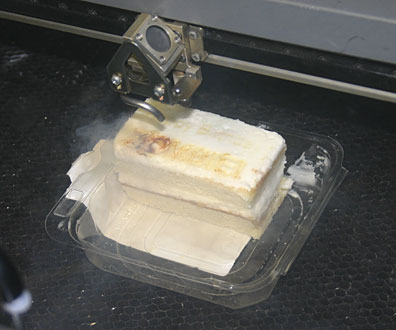
details for the curious - I'd been playing with lasering this icing earlier and it was so hard to get a good etch. kind of drove the message. wish I'd had an up close video to record the nasty looking burning and oozing. the parameters I used - too comlicated to report and I used many rounds, some on just one or two letters while I tried to figure out just what interesting effects I could pull out of this misbehavin' mess.
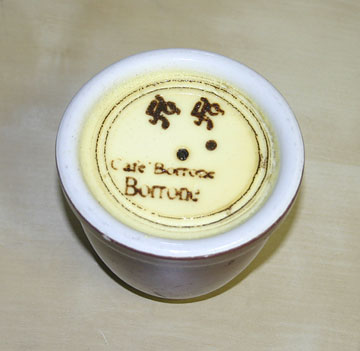
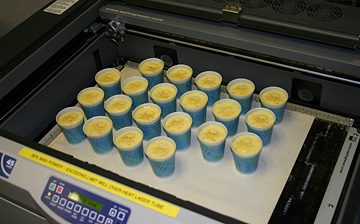
with great fanfare from fellow laserists, I etched designs onto custard just to see if it could be done.
took about 10 tries to get something reasonable. we tried both raster and vector. had vector cuts ripping right through this custard. we could see the tiny sliver being made, as if with an invisible hot wire, and then the custard closing in on itself as the laser moved on. really cool to watch!
at fast etching speeds, the custard did a very fast short entertaining jiggling (ok, so I'm easily amused).
I etched the name of the cafe (Cafe Borrone) that sold me the custard, saved that part and ate the rest. it didn't have nearly as strong of a burnt taste as other foods I've done. oh, well, maybe because it's supposed to taste burnt? I'll return their etched name part in the bottom of the cleaned custard cup. surely they'll be impressed.
 to the left is a closeup of a piece of iced white cake.
you can see at the very upper left of the cake is a light indentation with another indentation to the right, a bit cut off. then the blasted browner one in the forefront. these are my trials as I increased the heat.
the artwork was vector and raster based, with a black filled circle on the inside surrounded by a vector circle a bit larger. the heat settings for this outer vector circle were too cool during the earlier trials but you can see it was getting pretty messy in the hotter forefront one. we laughed watching the melting, bubbling and pushing! I wonder how much heat it takes to splash icing onto the laser cover.
not sure you could handle what you might see as an epidemiologist? laser white cake icing for a while.
I have a bit more cake to play with today and know exactly what I will be putting on it. watch this space for further posts.
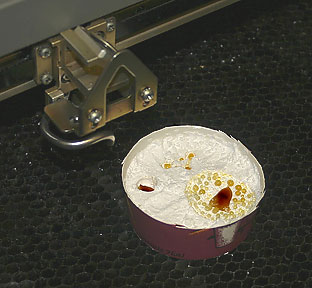 and last we tried confectioner's sugar, held in a shallow cut down paper cup. we tried artwork of a filled circle, several little circles with filled lines connecting them, and a spiral with 27 revolutions within about an inch. consistently, we got balls of sugar to form, then they might move and join with another ball nearby. or maybe they'd stay where they were. made a beautiful organic pattern of spheres.
yes, I ate these little bits. they were crunchy and tasted just like cotton candy - no burn taste.
earlier that day, I taught a laser class and had a friend attending. afterward, we wandered through the grocery store to get the white cake and conf sugar. he remarked, "now I'm walking through this place wondering what everything would look like lased." ahhh ... another kindred soul.
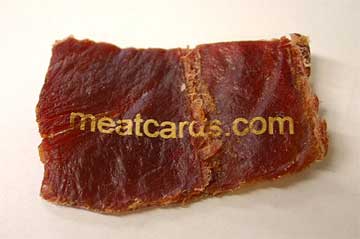
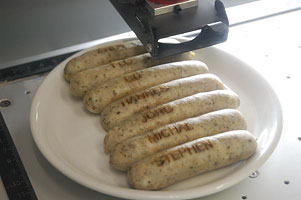
Imagine going to a party and all the food you eat has your name on it ...
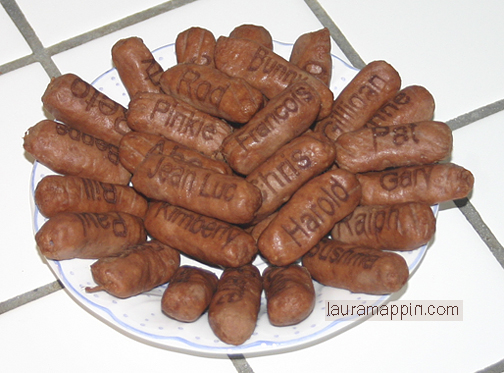
they're quite the hit at parties! well, as long as I spell everyone's name right.
no, I didn't use a branding typeset. I etched/burned them on a laser cutter. here's how:
first, I dried a bag of little sausages. if you don't dry them first, you'll get bubbles as you etch. water seriously impacts the burn. I didn't just dry the outside, I wrapped each sausage in a couple layers of paper towel and squeezed it without breaking it open. see the material science just waiting to be learned!
then, I made a quick jig to place the sausages in the laser so I could etch many at once and actually finish in my reserved time.
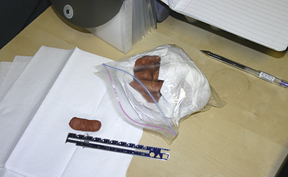 I measured a sausage with my trusty 6-inch hem gauge which I always travel with.
the first time I did this I learned I'd picked one of the smallest sausages and so I had to tweak my process later.
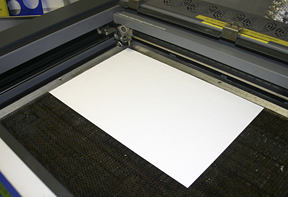
I placed an 11x17 piece of paper on the laser table to hold the sausages. I made laser marks on the paper to tell me where to place the sausages. then I used the same digital file to position and size the names.
so, in CorelDraw, I built a rectangle 2 inches wide by 3/4 inch high to match what I thought was every sausage's dimensions.
so, in CorelDraw, I built a rectangle 2 inches wide by 3/4 inch high to match what I thought was every sausage's dimensions.
I added two very tiny circles in the upper left and right of that rectangle, grouped it all together and replicated it across my 11x17 workspace, putting the rectangles anywhere. they don't have to be aligned with each other. a very nice quick way to build a jig for many purposes.
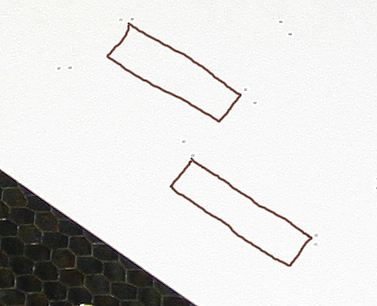
I chose just the circles and had the laser cut them out. this would be faster than etching anything across this large area.
the image above shows the laser cut circles with two of the many rectangles photoshopped in to give you an idea.
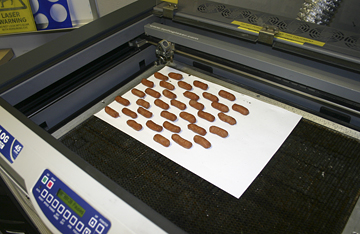 then I laid out the sausages on the paper lined up with the tiny holes.
I was planning on lining them up more densely than this but since I'd unknowingly chosen the smallest sausage on which to build my jig, I had to improvise. I used every other rectangle so that it was easy to remember a pattern to then build out the names.
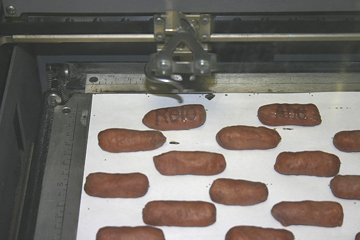 I filled every other rectangle with an appropriately sized name and sent just the names to the laser.
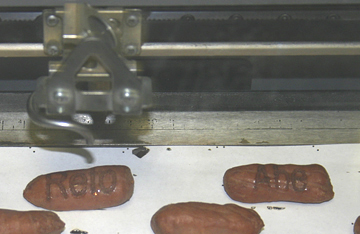
these are getting etched. you can see a bit of light coming off the first sausage. they're also still showing signs of moisture but it's subtle enough to still allow the words to be readable.
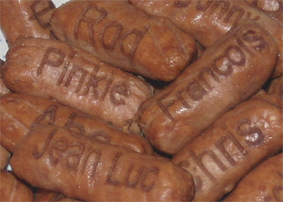
harvest them and get thee to a party!!
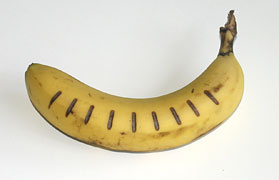
you may think of banana etching just for those who want to put messages of text (as opposed to text messages) on bananas.
not so. you can etch equidistant lines to ensure evenly sliced pieces for your breakfast cereal.
not so. you can etch equidistant lines to ensure evenly sliced pieces for your breakfast cereal.
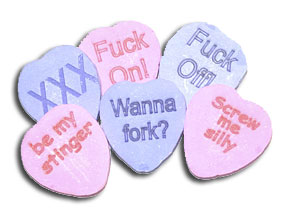
 oh, yes you can put your very own secret luv messages on candy hearts, chocolate, or heart red acrylic in time for Valentines Day this year!
for the g-rated valentinist as well as the r-rated or more.
I'll help you drive the laser in its unbridled fashion. it's so fun to make a CNC machine create these shapes and spell these words!
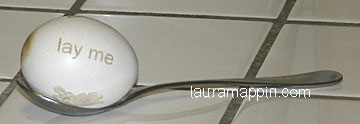 Valentine's Day? Easter? I'm so confused.
I was etching valentine candy hearts earlier. then a fellow laserist gave me a dozen raw eggs he was done etching and I played in the open spaces.
 I tried to put my face on them but it didn't come out so well. (I'm sure the crack was there beforehand!) out of 6 tries, this was the best.
so I reverted back to simple text (above). what to say on an egg ...
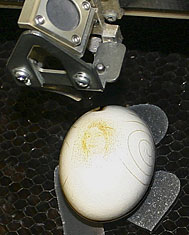
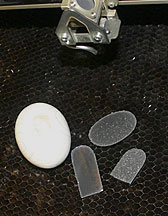 so I arranged small heavy pieces of steel right up against the egg and that worked. I also brought the speed way down (as well as the power) which I think helped as well.
my fellow laserist used the egg carton as a jig. that's usually fine if the carton material is safe to get hit with the laser (some materials like this will flash fire.)
his etchings looked better than mine. but since I started out close to his parameters, I suspect, as has been the case before, that my artwork needed to be modified. but by the time I'd done enough samples to conclude that, I was out of white spaces.
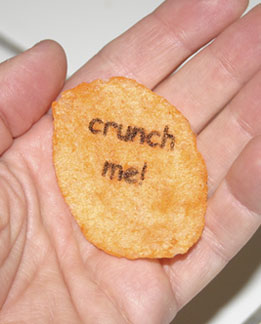
with a CO2 laser, one can deface pretty much any solid item sold as food.
make your own online.
for the curious, some are raster etched while others are done using very low heat vector settings. the laser room smelled like cotton candy.
make your own online.
for the curious, some are raster etched while others are done using very low heat vector settings. the laser room smelled like cotton candy.
